Hardware: Raspberry Pi 4 4GB
Operating System: Ubuntu Server 22.04 ARM64
Intro
Currently I have a Raspberry Pi 4 with 4GB of RAM that I plan to use for running some critical homelab services in a small, low power package. Using Docker to run these services seems to be the perfect way to accomplish my goals, and Portainer will allow me to have access to easily manage all of the containers running on it through a web interface.
This setup tutorial will be referenced for all future Portainer tutorials for the Raspberry Pi.
Update Ubuntu Server 22.04 LTS
The first thing that we are going to do is to make sure that all of our existing software packages are running the most up-to-date versions.
1
sudo apt update && sudo apt upgrade -y

Install Docker
Now that our Ubuntu Server install is up to date, we can go ahead and install Docker.
Thankfully, Docker has provided a bash script that is ready to go. You can download and run the script automatically using the command below.
1
curl -sSL https://get.docker.com | sh

This command downloads the install script from Docker’s site and pipes the file directly into the command line.
Set Linux Permissions for Docker
Once Docker has completed its install, we need to modify some of the user permissions in Ubuntu.
In order for the user to interact with Docker services, it needs to be added as a member of the Docker group.
1
sudo usermod -aG docker your-user

Make sure to replace “your-user” with the user that you want to allow Docker access to.
Running Portainer
Once Docker has been installed and your user has been added to the docker group, it is time to get Portainer.
We are going to run a Docker command to download the latest Portainer Docker image for the ARM processor.
1
sudo docker pull portainer/portainer-ce:linux-arm64

The final installation step will be to create and run the container for Portainer. If you are already using port 9000 on the device for something else, you will need to change the ports below.
1
sudo docker run --restart always -d -p 9000:9000 -v /var/run/docker.sock:/var/run/docker.sock -v portainer_data:/data portainer/portainer-ce:linux-arm64

Now you should be able to navigate to the Portainer web console using the IP address of the device and port 9000.
1
http://[DEVICE_IP_ADDRESS]:9000
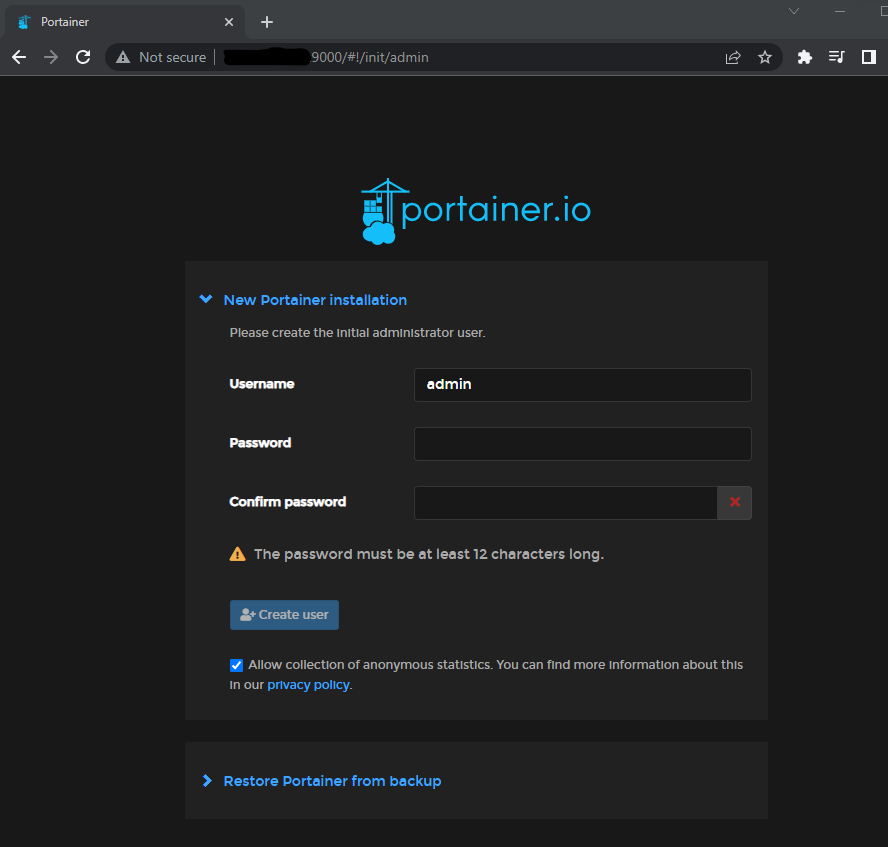
Configure Portainer
Once you have verified that you can reach the Portainer web console, we will need to setup a username and password.
Once your account has been created, select the local environment option (in our case it’s labelled Get Started).

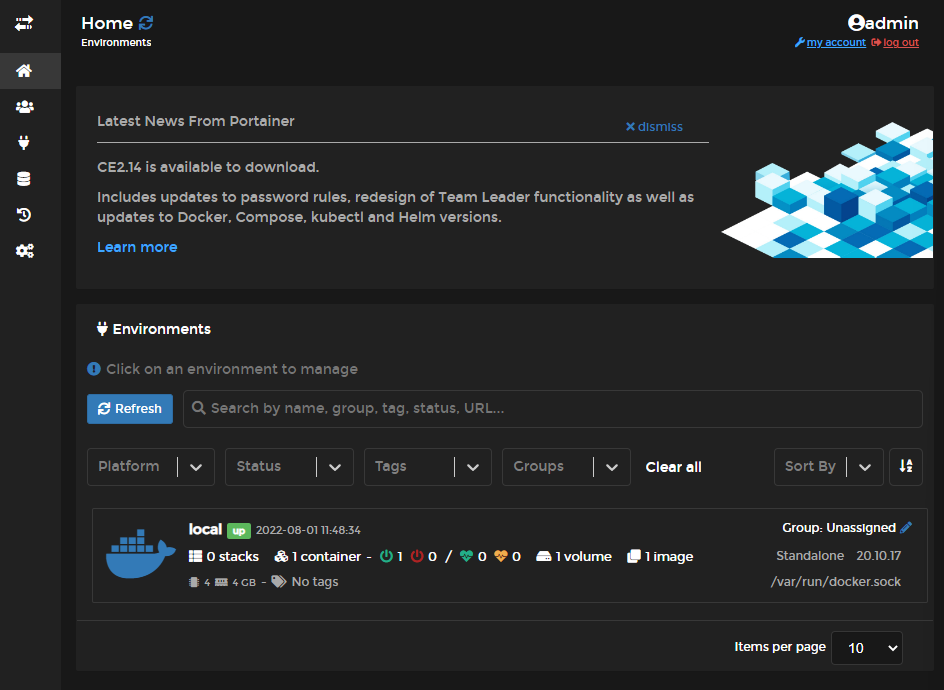
You should now be connected to the Portainer home dashboard.